• Home
  • Hearts For Teaching Blog

When The Sun Shines

This is a tough time of the year in many parts of the country. It’s been a rough winter. When it’s been that rough outside, it can get rough inside too! Some of you haven’t had a full week of school in a long time because the weather keeps getting in the way. Some of you haven’t seen the sun in weeks. (Yes, that actually happens!)

We are finally getting to the point when we can finally see a little hope for a break in the weather. We need it. And when it breaks and the sun comes out, most of us don’t complain that it FINALLY SHOWED UP. We don’t whine that it SHOULD BE LIKE THIS ALL THE TIME.

We know that life isn’t like that. So let’s be a bit easier on ourselves, and on our students. Those brilliant, sunny moments in the classroom just don’t happen every day. Getting everyone going in the same direction and accomplishing something in just over a half hour is a major accomplishment.

So when the sun shines….indoors or out…just enjoy it. Bask in it. Soak it up and let it fill you. Don’t darken it by thinking that it’s about time those kids got it together or that they should be like this all of the time. Let it shine. Don’t throw any shade in it’s direction. We need to see that moment and remember it just as it is.

Teaching isn’t executing the perfect choreography, no matter what you have been told. It’s dancing in the sun, and in the rain. Both dances are beautiful. They are just different.

with love,

Laurie

Need PD?

Comprehensible Online is a unique opportunity to see, hear and learn from skilled CI/TPRS practitioners ON YOUR OWN SCHEDULE!!  Last year hundreds of teachers participated in this online event and this year has even more presenters and presentations. It also goes for nearly two months, so there is time to watch, respond and communicate with the presenters!  

Each webinar runs for 30-60 minutes and many include handouts and classroom demos.  Here are some comments about last year’s event:

“So nice to be on holidays! This windy weather is perfect to snuggle up inside.. So far I’ve only watched Annabelle Allen, Bryce, Laurie and Tina Hardegan, which have all been really insightful. Hoping to try out MovieTalk and the classroom jobs next term…”

“As a primary school teacher, I can’t top Amy Vander Deen’s very thorough presentation. However I just loved Laurie Clarcq’s Open Sesame, on negotiables, non-negotiables and – importantly – being open to the new, with trust, humour, bravery and creativity. Many more to go, “

What I loved most as a participant was the ability to watch when I was available, instead of having to rearrange my entire schedule in order to participate!  I could also ask questions and make comments in a way that isn’t always possible at a conference…and I could watch a webinar more than once!

What I loved most as a presenter was the conversations that resulted from the posts about each webinar!  I was able to answer questions and help individual teachers during and after the conference.

This year the conference webinars will be organized by categories so that participants can see at a glance what is available and what meets their needs.  There are also webinars that help participants who are just starting to understand and/or implement Comprehension-based instruction…..so whether you have been in the “field” for a while, or just getting started, there is something for you here!

You can find more information about the conference and registration here: www.comprehensibleonline.com  

Want to save money?  Use the code laurie19 to save $25!!

With love,

Laurie


Literacy Workshop: Stillwater, NY

Thank you to the teachers and administrators for helping to set up this workshop in Stillwater! Stillwater is just 45 minutes from Albany. We will be starting the workshop at 4:30 but you are welcome to arrive as you can! Snacks will be provided for you! We will finish by 7, but again…attend for as long as you can!

We will be looking at Literacy in the second language classroom and teachers of all levels and languages (including ELL/ESL) are welcome to attend. We will look at how literacy can enhance language acquisition and how each teacher can begin to implement highly-effective practices in their own classes. This is a wonderful opportunity if you can’t make it to NYSAFLT in Rochester, or, if you are on your way there!

If you have any questions, please contact me at [email protected]

Interested in signing up? Here you go!

https://www.eventbrite.com/e/literacy-for-the-win-reading-in-the-language-classroom-tickets-50977897263

Start From The Heart: Stepping Into The Curriculum

Ok…you have information in front of you: lesson ideas, activities, suggestions, Facebook pages, blogs, and more….

Now what?

How do you start? How do you know where your students are going? Which unit do you teach? What topic ? Which video? Which song? It can be so overwhelming…….

First: THERE IS NO “RIGHT” WAY TO DO THIS. If you teach Spanish or French, and feel that you need a lot of structure and support starting the year with Comprehensible Input, really consider purchasing a curriculum. Teach For June, Comprehensible Classroom and Adriana Ramirez all sell prepared curriculum, especially for novice and intermediate students.

Second: If you teach a different language, or can’t find what suits you, or want and enjoy the flexibility, you will be creating your own curriculum. If you have never done this before….it’s okay! Look for a future post for ideas about structuring a curriculum and in the meantime, follow the blogs and pages that speak most clearly to you. With that information and your own knowledge, experience and intuition, you will be fine!

Third: Don’t feel that you have to dive right into anything. Remember, you can put your classroom into place, your expectations in place and begin building positive relationships without a “structure”, “vocabulary” , or “theme”-based year-long plan. These will begin the year by establishing that your STUDENTS are the focus of your teaching!

Let’s look at what vocabulary and structures are involved in those daily interactions:
(I’ll list the possibilities in English, but of course you will know what they represent in your target language)

If you greet students each day, talk to some about how they are feeling, use the target language for general classroom exchanges, talk about school/local events, birthdays, and the weather, you will AUTOMATICALLY work with the following:

Hello, Good morning, Good day, Good afternoon, Good evening, Good night etc,
Good-bye, See you later, See you tomorrow, Until next time, etc.
How are you? How is s/he? I”m/S/he is well, poor, ok, tired, nervous, hungry, ready, worried, sick, sad, happy, etc.
What is your name? I’m, my name is, What is his/her name? S/he is, his/her name is
Who is? Here, present, absent, etc.
Where is? Here, there, in the office, bathroom etc.
May I go to …..etc.
May I use…..a pencil, paper, book, etc.
Here is…
Sign the paper…
Take the pass…
Look (at), Look for, Listen/hear, Write, Say, Wait, Give, Pass, Stop, Stand, Sit, Think etc.
What do you need/want/have/lack?
One time, many times, always, often, never, sometimes etc.
Today, tomorrow, yesterday, tonight, last night, this/last/next week, month, year, day
Days of the week, months of the year, numbers 0-31, and the year.
What is the day/date? What month is it/will it be? When is your birthday, the dance,vacation etc?
What is the weather like? It’s hot, sunny, breezy, windy, cold, rainy, snowy etc.
What season is it? Spring, summer, winter, fall.
What do you like? What is your favorite? When do you_____?

There is really NO NEED to plan special “units” on these topics because you integrate them bit by bit until they are part of the natural rhythm of your life with the students. What you will really be doing is teaching, practicing and utilizing a ROUTINE for:

Greeting students
Assigning seats.
Taking and reporting attendance.
Discussing the calendar, weather and current events.
Being prepared in class.
Getting permission to leave class.
Leaving and returning to the room.

If you teach a signal, or a call and response pattern you will also establish a ROUTINE for refocusing the class…not to mention whatever vocabulary you choose to use.

That is A LOT of high-frequency language!!

So don’t be afraid to take your time to set those things up.

Are you worried that it will be boring? Don’t worry! You will be personalizing and interacting with every new routine. Because you will be connecting what you are doing with the students, it will be interesting to them.

Let’s start with greeting the students. If you greet some/all of the students as they enter you can begin to bring your sense of humor and your personality in from the beginning of the class.

You could:
Put 2-5 questions on cards. Shuffle the cards and show the card as you greet students (Hi, Hello, How are you?, What’s up? etc.)
Don’t settle for just “Good” or “Okay”. Ask a follow-up question: a little good or really good? (use your voice to add interest) Allow/Encourage the use of gestures.
Add a fun handshake, fist bump etc.
Have students make a question or greeting card and decorate it. Use those cards to shuffle through and show as they enter.
Ask the first student to stand next to you and keep a tally: How many are good? How many are tired? Etc.

When taking attendance:
If your class is 20 or under: Ask Where is ________? The class points to the student and says __________is there! (with enthusiasm!! Like a game show host!) This loses its joy if you have 30+ students though!
Teach students to ‘invent” a location and action for students who are not there. Be careful with this….make sure that you teach them to say desirable things…not things that would embarrass or humiliate the person who is missing! If your students might go too far, make a poster of appropriate ideas for them to choose from! ( Is playing basketball with Steph Curry, is on a cruise with a world-famous soccer team, is playing guitar in a concert with a popular band, etc)
Assign students a “neighbor” buddy. Remind them to get work for that person as you take attendance if their buddy is absent.
Give maracas or a tambourine to several students. Set up a chant for attendance. Where are you John? I’m here! Cha cha cha!
Ask students to tell you something they like (to eat, watch, listen to) when you call their name: Alexa Snickers! Maria Reese’s!

If you teach Spanish, and have Sr. Wooly, definitely use that video to intro leaving the room to go somewhere!

Here are some other video clips you can use ( 30 seconds of English for an intro guaranteed to get there attention is worth it!!

And this one has no spoken English…just one quick slide….very fun!!

It’s not too hard to put together a daily or weekly routine around that calendar. After greeting students and taking attendance, direct students’ attention to a calendar. It can be a pre-purchased calendar, a teacher-(or student!!) made wall calendar or something projected or in a PowerPoint.

Many students remember this routine from their early elementary days, and enjoy the nostalgia of reliving that experience!

If you need students to be held accountable for this, you can create a weekly or monthly form for them to fill in and then hand in for a grade. Keep it simple to complete and simple to grade or it will drive everyone crazy!!!! We want them to enjoy the activity!!

You can talk about: the day, the date, the weather, holidays/birthdays, after-school activities, the school menu, National _______Day, ….so many things!!!

When you tie the discussion to students’ interests, preferences and daily activities, it really is interesting!

Following this is the time that many teachers have used to build in a certain activity for each day of the week. (Weekend review, Meme Monday, Baila Viernes, Weekend Plans etc….)

Fourth: Relax and enjoy!!!!!! If the teacher is uptight about “covering” the material and having the “perfect” curriculum, it will spill over into each and every class. You are where you need to be right now. You are where you are. Do not worry about not being more talented, more skilled, more prepared, more creative. Enjoy being yourself, interacting with students so that they understand and can respond, and relax!!!

It’s going to be fine!

With love,
Laurie

Start From The Heart: Problem Solving-Seating

Oh the possibilities!!

First, let me be clear. TPRS/CI can work with ANY kind of seating arrangement.

So let’s look at seating from the basic elements:

The physical arrangement of the room creates a certain atmosphere which can really affect the “tone” of the class. Each teacher has the right to choose the arrangement that works best! There is no ‘best” way.

Traditional Rows: It is absolutely easier to put kids in “traditional” rows, and create a seating chart, in alphabetical order in order to take attendance. Especially if you have very large numbers. Make a seating chart, in two days they will remember where they sit, you get used to certain faces in certain seats and taking attendance/learning names is much easier than it is in nearly any other option.

Whenever possible, have a clear lane to walk in on all four sides of the room. We always want to be within a few feet of each student when it’s necessary.

If you have a lot on your plate, or you/your students need a lot of structure, use this option….especially to start with! You can always change seating as the year progresses!

Theater Seating: Students are in rows, but angled towards the center of the room, especially the outer rows. This allows the entire class to focus on the area in the front of the room which now becomes a “stage”. Because it is slightly different than the “traditional’ rows, it can help teachers and students to step into the new mindset that being in a CI class requires, without being a shock to the system.

Volleyball Seating: Students are in rows, facing the center of the room and the “stage” can then be the front, back or center of the room as needed. There are many benefits to this arrangement. The biggest challenge to this arrangement is that students are now facing each other and may have to learn to interact as a class without distracting each other.

Semi-Circle This is one of my favorites…and it can be done in several rows of seats. It feels somewhat “informal”, but offers a sense of structure for those who need/want it.

Circle: Not all rooms are large enough to allow for students to sit in a circle, but it can be a great arrangement for many smaller groups! (My students often lovingly referred to it as the “counseling circle.” )

Groups or pods: There are definite benefits to having students sit in groups, but also a number of challenges for the TPRS/CI teacher. It can be difficult to keep students focused when they are all facing different directions and also facing a small group of peers!

And of course, there are combinations and adaptations of the above. Remember, you can actually change the seating any time during class once you have trained students how to do that carefully and quickly. (That’s a future post!)

Assigned Seats: This is another choice that you get to make!

Some teachers, particularly at the high school and college level, do NOT assign seats. They choose the seating arrangement, but allow students to choose where to sit each day. And….each day could be different, depending on who arrives when etc.

Another option is to allow students to sit where they would like the first few days, then ask them to choose a “permanent” seat for the quarter/semester/year…once they have found a place that they feel comfortable.

The third option is to “randomly“ assign seats. The teacher strategically chooses specific locations for certain students and then randomly assigns the class to the remaining seats. All of this is done before presenting the seating chart to the students. (although even young ones are pretty savvy about what we have done and why!)

Then there is also the traditional, alphabetical arrangement mentioned above.

Seating Charts

Now that you’ve chosen a seating arrangement, think about how you will create a seating chart. Electronically? The picture feature on these is FANTASTIC! By hand? Some people prefer it. Maybe you prefer to use an app like Dojo. Check out the attendance chart I used!

Again, there is no right way. Just ask yourself three questions: Is is accurate? Is it efficient
as you take attendance and learn names?

Attendance can be time-consuming, but it is important!!! Schools are adamant now that we take and record attendance promptly and accurately. The seating arrangement we choose can affect how we take attendance.

Need a new idea? Check out this post: The Magic Attendance Poster

Also keep in mind that when there is a substitute, it is handy to have some sort of agreed upon arrangement with students about seating, attendance and behavior. So if you choose to be flexible about seating, make sure the sub doesn’t need all period to call out the roll to take attendance.

Last but not least….YOU ARE NOT REQUIRED TO HOLD ON TO ANY ONE WAY OF DOING THINGS!

If you start with one arrangement, and want to try something else, go for it!! It is not a bad thing for students to see you mixing it up, evaluating something new and making decisions. It’s a wonderful thing!

Just don’t take on more than you need to at any one time. You are important.

With love,
Laurie

Start From The Heart: Solving Problems-Comprehension Checks For The Win!

Knowing why to use Comprehension Checks and knowing how to use them aren’t really the same thing. Let’s try to make a connection between the two:

Why? To allow for and encourage processing time.
How?

Create a signal/gesture that indicates that the students are going to think about a piece of the
language that they see/hear. For example: Tap your forehead.
Repeat the language before iliciting an answer/response from the students.
Pause.
Then use a Comprehension Check from the previous post.

This is helpful to plan for when utilizing new or difficult to process language.
(Hint: Don’t overuse this….once or twice in a 10 minute period is enough even in a beginning level class if the language is being used slowly, carefully and in the most comprehensible way possible.

Why? To assess the level of comprehension of a particular item.
How?

Identify an item that may need clarification. (HInt: not every item needs clarification!) Me falta
Ask a student to connect language to meaning using a Comprehension Check.
(Hint: ask a student who will know!)
Repeat the item in context. Me falta la contraseña. No puedo usar la computadora.

Why? To allow differentiation of instruction/assessment.
How?

Identify a section of difficult or advanced language.
Ask a student (Hint: who can answer the question!) to assign meaning using a
Comprehension Check.
Ask another student to agree or disagree with the first student.
or
Ask a student the meaning of a piece of less-challenging text then ask a faster processor another way to
say it in the target language.

Why? To fill in meaning for students who have been absent.
How?

Identify the language that will need to be reinforced then….
Ask a student to give the meaning in English in a loud “stage whisper” whenever the word is used.
or
Have the student yell out the meaning
or
Have the student hold up a sign with the meaning in English/picture
Have all students do a specific gesture.

Why? To get more repetitions.
How?

Very, very sporadically. And carefully. Preferably with humor or dramatic effect.

There are even more ways to utilize Comprehension Checks, but it’s only the beginning of the year so we’ll stop there!

with love,
Laurie

Start From The Heart: Solving Problems-Comprehension Checks

Warning: Some of you may find this controversial. But…I still believe that this is an important skill for teachers to look at, and to use: Comprehension Checks.

Like any skill, it can be overused or used without thought and reflection, and in those cases, Comprehension Checks can be poorly received. But….with a little thought, practice and reflection, using Comprehension Checks can be, an amazing problem solver for us.

What is a Comprehension Check?

It’s when we find a way to determine whether or not, or to what degree, a student understands what s/he is hearing and saying.

It might look like this:

The teacher says to the students:

Tengo un problema. Quiero usar la computadora, pero me falta la contraseña. ¿La sabes?
(I have a problem. I want to use the computer, but I’m missing the password. Do you know it?

The teacher asks a student or students one or more of the following as needed:

In English:(expecting answers in English)
Do I need a password or a photo?
Do I want to use the ATM or the computer?
What did I just say?
What is my problem?
What do I need?
What do I want from you?
What is a “contraseña”
?

In Spanish: (expecting answers in English or Spanish as indicated by the teacher)
¿Necesito usar la computadora o el telêfono? (Do I need to use the computer or the phone?)
¿Quê necesito …el número de teléfono o la contraseña? (What do I need, the phone number or the password?)
¿Cuál es mi problema? ( What is my problem?)
¿Quê quiero hacer/usar? (What do I want to do/use?)
¿Quê me falta? (What am I missing?)
¿Quê necesito? (What do I need?)

The teacher could also ask students to identify the meanings of words or questions by pointing to pictures or making a gesture.

First, let’s look at why a teacher may want to incorporate Comprehension Checks into his/her daily interactions with students. Later we’ll look at why it’s helpful to do so from the very beginning of the year/semester.

First and foremost, there is a SECRET goal behind the use of Comprehension Checks….
Shhh…..
they actually provide additional processing time for some students!!

We rarely address this gift, but Comprehension Checks buy those students just a little
extra time to let the meaning of the sound/text sink in. This is incredibly helpful in a
class with students who have a variety of processing speeds.

2. The most obvious goal of Comprehension Checks is to make sure that the input we
provide is COMPREHENDED, not just comprehensible. I can always hope, as the
teacher, that students have understood what I said, and that, in time, it will be totally
comprehensible, and closer to being acquired. Or, I can assure that the correct
meaning is assigned to what students have heard/read and move them closer to
acquisition.

3. Comprehension Checks provide a way to differentiate. By isolating different pieces of
the input, and asking a variety of students for meaning, we “spread” the wealth. We can
provide opportunity for students who need find meaning a shorter or more familiar chunk
of language to find success. We can challenge our faster processors or more advanced
students while helping others to match meaning

4. Comprehension Checks bridge the gap for students who have been absent for class. It’s
a situation we all deal with. When a student has missed the introduction of a new words
or phrase, Comprehension Checks allow us “pop’ in meaning so that those students can
hear the meaning of language that they need to understand.

5. And……….a way to provide more repetitions if the teacher wants to do that. Now…they
aren’t exactly useful repetitions if the students haven’t already matched meaning to the
sound and the text…but once they have….BOOM…extra reps.

It is very helpful to build in our use of Comprehension Checks from the first few days of classroom interaction in the target language. When they are a natural part of our language pattern, they become less “stilted” and “forced”. Here are a few of the advantages to “training” the class to listen for and respond to Comprehension Checks:

By building these types of questions into our classroom interactions, we naturally create the expectation that we will be checking in….because it is important to us that all students get the chance to work meaning out for themselves.

If Rule # 1 is Listen to Understand, then Comprehension Checks support the message that we absolutely, really and truly want students to listen AND understand….not just look as if they are listening and understanding. Students believe what we do…..not what we say.

By starting the year/semester this way, we can get a better handle on exactly where our students receptive skills are. It gives us nearly instant feedback that we can use to monitor and adjust the input we provide.

Done carefully, differentiating with Comprehension Checks establishes and reinforces these ideas:

All students matter.
The core/main idea of an utterance is of primary importance.
Details add to interest and understanding.
Miscommunication happens, and can (should!) be addressed with grace.

With love,
Laurie

Taking Care of Problems: Comprehension

I don’t understand.

THIS phrase is the first, and most powerful, and practical, place to start taking care of problems!!! Teachers committed to Comprehension-based Instruction often use a “signal” for students to use when the teacher has delivered a message in the Target Language that is confusing or incomprehensible. This is really TAKING CARE OF PROBLEMS!!!

It’s preventing behavioral problems that stem from not being able to follow what is happening in class. It also sidesteps behaviors that arise when a student feels incompetent, unimportant, or incapable in any way. Allowing, actually encouraging, students to communicate in a safe way that the language or the message is confusing creates a safe space that accepts students where they are….instead of pointing out where they “should be.”

It’s giving students power over their own environment and their own input and it is very important. Even if they don’t use it as often as we might like, the fact that we encourage it, accept it and respond to it is incredibly important!

What does having a signal for confusion do? It also allows students, who sit all day long, to communicate that they may have, quite naturally, lost focus for a few moments. It allows us to address that and bring them back into the action.

Wondering who decides the signal and what signal to use? Sometimes the teacher decides what it will be and sometimes the students decide. These signals might be:

A hand over the head.
The “time-out” sign
One fist to the palm of the other hand
Hands crossed over the chest
Stomping on the floor with both feet until the teacher notices.

All of these can be effective, especially if we encourage everyone to use the signal if they see another student expressing concern about comprehension. It’s easy, as the teacher, to miss the sign!

When observing teachers I’ve seen the teacher use the signal when s/he is confused…I love that!!

Some teachers also create a sign for “Slow Down” or “Please Repeat”. After students are comfortable with those, it is easy to make the transition to using the phrases in the TL as well!

Another problem-solver is providing students with a way to ask what something means in the target language or how to say it in the target language. One of the first things that I note when I teach a level 2 class is if the students are “trained” to say “What does _____mean in English?”…and they ask me in Spanish!! Or ….”How do you say _____ in Spanish?” and ask me in Spanish!

Those are not just handy phrases. They are problem-solvers. They give students permission to not understand, and to ask for clarification. When our students have those phrases available to them, they know that we don’t expect them to know everything and that we encourage them to ask!

I know that not all students are comfortable communicating that the language is not comprehensible. That really is okay. I don’t expect they will, but I will invite them to, and often. I will also be thankful and express my gratitude every time they do. It helps us all. It takes frequent reminders; it really does. I have had to actually put it on the board, in a PowerPoint or my lesson plans or I forget to remind them. We’ve been trained NOT to communicate confusion. This will be new. But it is incredibly valuable.

This may sound incredibly simple. But it is incredibly powerful.

What do you and your students use to communicate that the language or the message is confusing?

With love,
Laurie

Start From the Heart: Problem Solving-Test Anxiety

Today’s post is a little out of order, but something caught my eye and I wanted to share it with you!!

One of the things we all deal with in the classroom is test anxiety. No matter how much “safety” we have built in, the moment the word “quiz” or “test” pops up (see what I did there? 🙂 ) some of our students just freeze up or freak out.

These ideas won’t necessarily solve the problem, but they will help! Not everyone can do all of these, but if you feel you can’t, ask yourself why. Is it that you really cannot, or is it that it is just outside of what you are accustomed to? Our own “beliefs” about assessment are based on experience, rather than reality….and it’s good to examine them!

So take these ideas seriously, but remember, not all ideas are for everyone!!

1. Don’t test students on things they haven’t “mastered”.

Is that possible? More or less, so let’s strive for more!! Traditionally, even if we don’t like to admit it, language tests have been all about the top students. They have been full of very specific elements and the exceptions rather than the regular. Let’s change that!

If we are teaching towards success, and for proficiency, let’s document what they KNOW and what they CAN DO. (Otherwise we should be writing Can’t Do Statements!!!) Let’s fill up our quizzes and tests with items that allow our students to demonstrate their strengths.

Now, if we need to assess a particular skill or item in order to find out if HOW the students are doing, let’s do a lot of informal assessment. Let’s use that formative assessment to adjust the input we deliver and the interactions we have in class!

EVERYONE acquires their first language without testing, I”m pretty sure that it is NOT a requirement for second language acquisition. If, and when, we are required by the powers that be to formally assess a skill, let’s do it with humor, confidence and joy. Or at the very least make it a part of a larger assessment so that the test is predominantly material they can be successful with!

2. Assess skills as well as knowledge.

This could be an entire course of information on proficiency and assessment grading! So I’ll just say that we need to look at our assessments to see if they actually assess what we think they are. Unfortunately, the easiest assessments to grade are often the least effective at actual assessment. Let’s pledge to continue to work with colleagues and explore ways to assess that don’t suck up large amounts of class time but do allow students to demonstrate what they can do, as well as what they know.

3. Don’t put every assessment in the “book.”

Like many TPRS/CI teachers, I usually only put grades in the book if approximately 80% of the students earned a score of 80% or above. If the class, as a whole, scores poorly, then clearly there was a problem with the assessment or I assessed them too early. I should not be punishing the students for those reasons.

If just a few students do poorly, then I follow the department/school policies for make up tests. And make sure they get what they need if I can!

4. Give students what they need in advance, without giving them the answers.

Giving them the answers is what they say they want, because their experience is that teachers want very specific answers. Is that what we want? I don’t think so. Not on most assessments anyway. So let’s provide our students with materials that fill that need to have “answers” to prepare for…at least just a little bit.

A. Short lists, in paper form or on sites like Quia where students can “practice” will fulfill some of that need and lessen anxiety for students, parents and colleagues. They don’t have to be required, but they can be if that fits the needs of your situation.

B. Readings, and listenings, are their best gift. Anything that you do in class that can be put on line or in print form for them to use as a resource is also a gift. Of course, we don’t always have time for that, but if you have access to upper level students (they don’t have to be yours!) or cooperative heritage speakers, take advantage of their abilities to help you to prepare these materials.

C. Show them the format in advance. Not because they need it to do well, but so that they are not stressed when they see it.

D. Give assessment “structure” they can count on. We have lots of routines in the classroom. Let’s consider “testing” routines. Here are the ones I used in my deskless classroom in the last two years:

1. An assessment every Thursday. Sometimes very short, sometimes longer. I may or may not have told them in advance what would be on it, but they did know the format. It could be reading/listening (illustrate, fill in the blank questions, English questions, Spanish questions, open-ended questions, etc.) or writing (free write, structured writing, response writing) They also knew how it would be graded.

Confession: I needed to schedule assessments or I would forget to do them. Occasionally I would just call an assessment-free week and I could, because I knew that I already had enough in the book!

2. Students arrived to find a good luck message on their seats. Check this out!

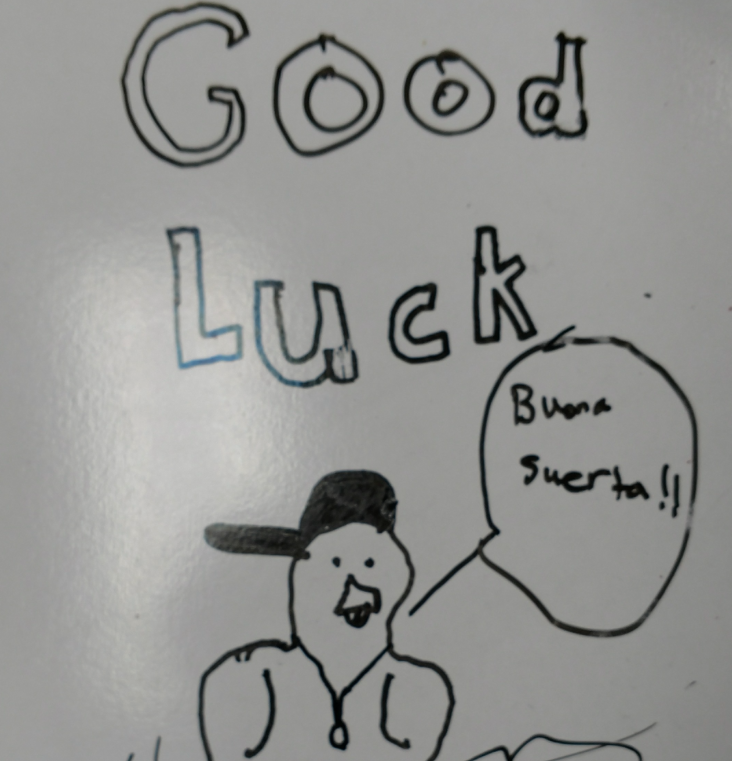
Students could, if they wanted to, take a quick picture of the message before erasing it to prepare for the quiz.

3. Students picked up a “good luck duck” if they wanted to. I had a collection of tiny plastic ducks that students could have by their side during tests and quizzes. The Patitos were very popular!

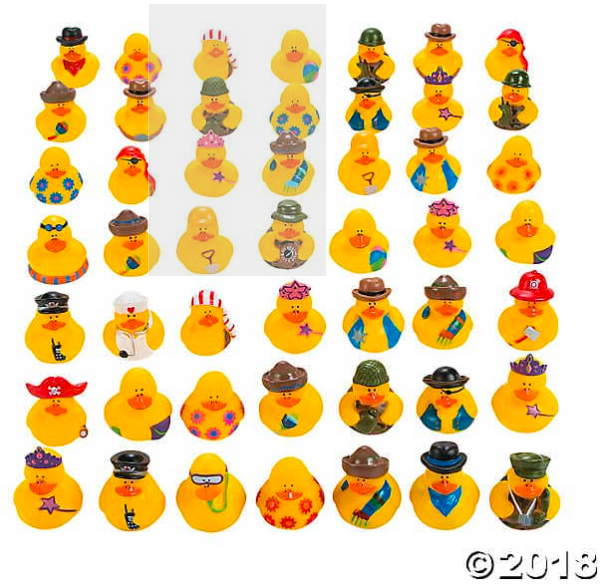
(These are from Oriental Trading company..click on pic…which is where I got mine.)

4. After our daily start routine, I would announce the assessment and ask student to find a spot to take their quiz. Because we were deskless, they were allowed, within reason, to go to a different part of the room to take assessments. During this time, students were allowed to talk quietly, make sure they had a whiteboard/marker and borrow a writing utensil if needed. (I only allowed a couple of minutes for this!)

5. I used one of our call and response signals to quiet the group.

6. Tests were passed out FACE DOWN AND KEPT FACE DOWN. If the test had two sides, they put it under their whiteboards. I reviewed and reinforced this all year!!

7. When everyone had a test, then, we all took three deep breaths together and turned them over together. Everyone put their name on the paper at the same time. Then, I went over the instructions, asked questions to make sure that they understood the instructions and let them ask questions about the instructions. (Middle school, remember?!)

8. Students began the assessment. When they were finished, they answered the quiz question (see below) that was on the paper or the screen/board. (See below)

9. When that was finished, students either handed me the paper or raised their hand for me to collect (depended on the group!!). Either way, I looked over EACH paper as it was turned in to make sure that it was complete. If not, I could have a short conversation with that student to encourage/support finishing it. I also checked to see if their name was on it! (Middle school, remember?!)

10. Students then created a good luck note for the next class on their white boards.

11. If students are still testing, those who have finished their tests found a book in our FVR collection to read.

12. When all tests are turned it, I played a favorite, upbeat song and everyone returned to their regular seats for the next activity!! (Often a brain break!)

This routine looks long on paper, but it wasn’t and it solved many, many, many potential problems!

E. Connect with a Question:

For years my colleague Karen and I have suggested the sharing space at the end of the quiz. We know that a lot of you already do it. It’s a wonderful way to catch a moment with each student. Leave a section a the end of each assessment where you can do any of the following:

1. Ask a question (L1 or L2….to be answered in any way you prefer…I usually ask for answers in L1 but encourage and celebrate all answers in L2!)

Some ideas:
What was the best part of your week?
What are you looking forward to this weekend?
What nice thing did you do for someone this week?
Name two places you want to go to in your lifetime.
Who do you look up to and why?
What makes you laugh?
Who is your favorite Youtube star?
Tell me the name of a show/song/book I need to see/hear/read.

2. Ask for a drawing. It could be something you can use to intro the next lesson, or simple a random “Draw me a picture.”

3. Ask for feedback on the test, the week, whatever!

4. Take a poll: What Friday activity do you want to work for?
Do we need a seating chart change?
Etc.

F. Assess with confidence, joy and humor!

It’s pretty difficult to change a mindset that has been years in the making, but it’s worth a try! So many of our students are “test-stressed” that anything we can do to lessen their anxiety is a gift, to them and to our entire community.

So don’t be afraid to make it fun!! Use humorous pictures for writing prompts and humorous stories for reading. Put one or two totally ridiculous, or class-related answers in the multiple choice options. (It’s a great sneaky way to check comprehension….if they laugh, they understood!)

Celebrate with words! Say OUT LOUD when you are proud of how they approached an assessment, did their best, etc. If we can remind them that it is their attitude that can make the biggest difference, it will become easier for them to believe it!!

I love to use music to “end” an assessment. Let them sing! Let them use percussion instruments (if you dare). Let them gesture! Let them dance! Go back to the joy any chance that you can! (Even if they pretend they are too sophisticated for it!)

This turned out to be a bit longer than I planned. It isn’t your typical assessment post, but I hope that it solves some problems for you!

Oh….I almost forgot! Here is what caught my eye. I would love to have kids use these, but only on tests!

(I found these on Zulily…click on pic)
with love,
Laurie